Old hardware, new life. Backing up with Time Machine on FreeNAS 9.2

Pentium 4 3GHz

Pentium 4 3GHz

There is always a good reason to put a relatively old hardware lying around to good use, and that is, make a backup server out of it. As for the choice of software, there hasn’t been a lack of it to choose from as a tool to run on that hardware capable enough to run as a backup server appliance.

Trusty and reliable FreeNAS 0.69 backup server

Trusty and reliable FreeNAS 0.69 (v6.9) backup server

Though I have already been backing up my data using Time Machine on Airport Time Capsule 2G, I have also been running rsync backup, side by side with Time Machine, using FreeNAS 0.69 (FNv6) on a somewhat old hardware (a rack-mount server with a P4 CPU.) FNv6 has been working as my backup without any problem at all. In fact, if not for the Time Machine capability of the new FreeNAS 9.2 (FNv9), I would stay with FNv6 for as long as I could. I am not quite sure if previous versions – v7‘s and v8‘s – have Time Machine support, but FNv6 definitely did not have one.

With this support on the current version, I am upgrading so I can perform a Time Machine backup on it as well. The software appliance is available for download at freenas.org with the usual selection of 32-bit or 64-bit arch.

Booting via USB

Using dd to copy FNv9 to USB flash drive

Using dd to copy FNv9 to USB flash drive

It is recommended that the appliance be installed and booted from a USB flash drive, that way, any and all hard drives can be allocated solely for storage purposes. It is also recommended that the drive be 2GB or more. As for my trusty old hardware, it is rather capable of booting via USB, hence there is no hard drive to waste.

In Linux and Mac OS X, making a bootable FreeNAS image USB flash drive is just a matter of uncompressing the image file and using dd to copy the file to the flash drive. If you use Windows to create the boot drive, the setup guide has details for the OS as well. All of these instructions and more are in the setup guide and is available for download from freenas.org.

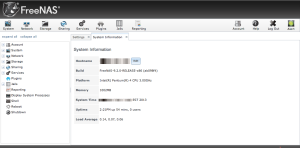
FreeNAS v9 System Info

FreeNAS v9 System Info

Having done all of the following:

  • copying the image file to the USB flash drive, and booting it for the first time,
  • assigning an IP address for the NIC via my DHCP server,
  • supplying a root username/password combination,

the hardware is now officially running FreeNAS 9.2.

Setting up the Time Machine storage volume

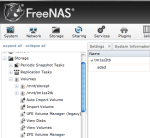
UFS volume tm1sz2tb contains the AFP share

UFS volume tm1sz2tb contains the AFP share

I next created a UFS volume that will eventually contain the Apple Filing Protocol (AFP) share for Time Machine. In my setup, I created volume tm1sz2tb (a not so creative name indicating a Time Machine designation on a 2TB size disc.) I planned to use a ZFS volume but after reading its requirements in the setup guide, I decided otherwise. My hardware may not be able to handle ZFS.

Note that the Time Machine feature is only available on AFP shares, not on NFS, nor on CIFS.

Setting up the Time Machine AFP share

Creation of AFP share. Note that Time Machine is enabled.

Creation of AFP share. Note that Time Machine is enabled.

Next, I created the AFP share whose path is on volume tm1sz2tb, and named it tm_afp_archive1. I made sure that the Enable Time Machine option is checked.

This AFP share is what I will expect to see when the time comes to configure Time Machine via the System Preferences pane on Mac clients. Having finished all the setup requirements on my FreeNAS appliance, the time has come to turn my attention on the Mac computers that will be backed up.

Configuring a Time Machine client

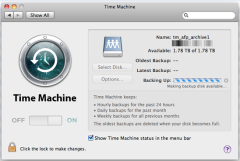
Time Machine using FreeNAS 9.2

Time Machine using FreeNAS 9.2

Setting up Time Machine between a Mac computer and Airport Time Capsule is quite straightforward. This is no different with FreeNAS v9 and Macs – at least in my experience. As long as the AFP service is enabled on FreeNAS, its guaranteed that the AFP shares show up on my Mac’s Finder application. This of course is true only after logging into the FreeNAS server. As for the clients, my Mac computers are still running Snow Leopard (10.6.8).

To begin using FreeNAS Time Machine capability on my MacBook, I opened System Preferences -> Time Machine, and selected the AFP share named tm_afp_archive1, via Select Disk. This is the same AFP share I just created on my FreeNAS appliance. From there, I could see that the back-up process is starting.

Conclusion

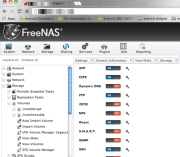
Active services

Active services

As has been my experience even with the old FreeNAS, version 9.2 has been nothing but very solid and accessible, and very easy to configure via its web-based user interface. It has all the services that I wanted for as a backup server appliance. The absence of Firefly as iTunes/DAAP server, notwithstanding, has always made me a big fan of it.

I have also enabled the other bundled services that came with it as this can be useful especially when copying files between other computers in my household. I normally use ftp or CIFS shares between Windows and Linux boxes, for example. I also use CIFS or AFP between Macs.

Postscripts

  • It is always a good idea to read the setup guide, especially about hardware requirements, if you are planning to install FreeNAS on an old hardware. Incompatibilities may arise.
  • During the first sync with Time Machine, as is for the first time with any other backup, it is better to have a wired connection between the computer you want to sync and the backup server. Wired connection, especially with 1Gbps, is by far faster than a wireless connection. That becomes apparent when backing up hundreds of gigabytes of data for the first time.

DIY: Nexus 7 Stand of the Garage Variety

While waiting for the Nexus 7 dock to become available for order, I was also trying to make my brain become useful over the holiday season and persuade it to think of a DIY stand idea. I discovered it is quite difficult to convince the brain to do anything during the holiday season.  But I continued nevertheless, and started looking at some materials I have in our garage, because really, what are the chances I might be able to find something that might be remotely useful for a tablet? In the garage? Practically zero. Until it is not. And so here is my own Nexus 7 stand (calling it a docking station is a stretch, of course).

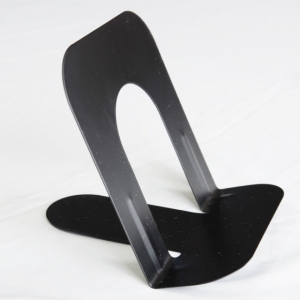
Bookend

The bookend bent at an angle

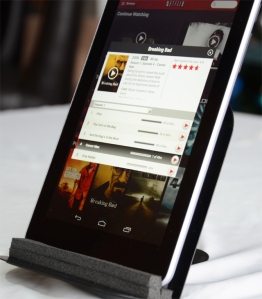
The bookend needs to be at an angle. At 90°, the device will, of course, fall forward. The back of the tablet is made of rubber material so scratches are avoided when in contact with the metal vertical end. The bottom of the bookend is a different story though, since it touches with the edge of the tablet. This is where my excess weather strip comes into the picture (quite literally in this regard).

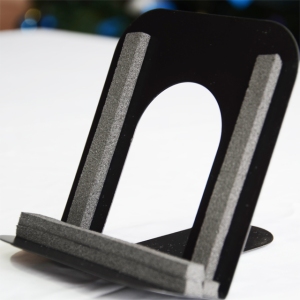
Weather strip

Weather strip

The weather strip has its sticky side stuck to the bookend, which probably needs no explanation.

Weather strip on bookend

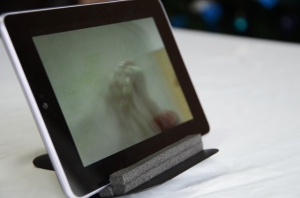
With both materials I found in my garage, it is quite simply, of garage variety. So with a 5 min hack job over, it is time to “dock” the tablet.

Nexus 7 landscape on bookend

Note the additonal weather strip foam on top of the bottom forward strip.

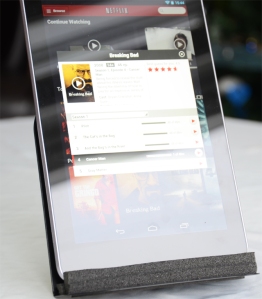
Nexus 7 portrait on bookend

There is no more excuse in not continuing to watch Breaking Bad’s first season!

Nexus 7 portrait on bookend

Note the additonal weather strip foam on top of the bottom forward strip.

DIY: Laptop we stand, guitar we fall

I have a portable laptop table with caster that I use as an audio mixer table. Nothing fancy there, just an ordinary computer furniture anyone can buy from an office supply store. The table top has just enough of a space for the mixer and a flat panel monitor.

When my monitor finally gave up, I set about putting my MacBook up at the spot where the monitor was, at least for the time being, instead of buying an immediate replacement. This involved a DIY game plan motivated by Lifehacker’s laptop stand ideas. I happen to look at my seldom-used guitar stand, a Proel Guitar Stand A Frame, and immediately knew I found my silly version of a DIY laptop stand. Without delay, got down to business of fitting the guitar stand to the table.

Since the horizontal base will not fit on the top of the table, I have to put it in such a way that the table top is squeezed between the horizontal base and the U-shaped guitar holder, as seen on Fig. 1. This was in fact the better approach – the gap between the base and the holder was a tight-fit to the thickness of the top.

Fig. 1

I screwed additional PVC conduit clamps on the guitar holder for added security. Fig. 2 shows the placement of the conduit clamps.

Fig. 2

I also added foam tube pipe insulation around the A-bracket, as seen on Fig. 2. This protected the MacBook from scratches. What’s more, all the rubber/foam protection meant to protect the guitar also provided the same protection for the MacBook. This can be seen on Figs 3. and 4.

Fig. 3

Fig. 4

I might have lost a good guitar stand, but I gained a laptop stand in the process. And this might just become a permanent fixture. The additional materials used were:

  • PVC conduit clamps (Bag of 5), ~$1.20
  • screws, $0.00 (stock)
  • foam tube pipe insulation, $0.00 (leftover)

Fig. 5

KeePass and KeePassX Cross-platform Password Management

The enormity of passwords one has to maintain is inversely proportional to the excitement level in creating new accounts that require them. Either that or:

  • Use a base passphrase and tailor it according to the site being logged into.
  • Simply reuse the same password – a practice highly discouraged and should be stopped.
  • Use a password manager to generate and maintain strong passwords.

There is a compelling case to use the third option: It removes the major burden of doing the first two options and in their place, just a single password to maintain. As to what comprises a good password manager, will be left to one’s preference. Having said that, what I consider relevant features are the following:

  • Has cross-platform support: Linux, Mac OS X, and Windows.
  • Does not require installation. Therefore, along with the password database, can be carried around in a USB flash drive and can run in non-admin mode.
  • Strong database encryption.
  • Preferably an open-source application.

These four points are covered by KeePass (Windows) in combination with its fork KeePassX (Linux and Mac OS X). I am using both to at least demonstrate the point regarding cross-platform  as KeePassX is a fork. The database compatibility though between the two applications is with KeePass 1.xx and KeePass 0.4.x, therefore I stick with those releases.

Installing on Windows

KeePass has a different installer for Portable Mode and it came with a zip file. All it needed was to unzip it to a directory on the USB flash drive.

Installing on Linux

KeePassX does not have a compiled binary for Fedora so it has to be built from source. I used my just-recently configured Fedora 14 as the build box. Fig. 1 shows the mounted USB flash drive where it would eventually be installed.

Location of KeyPassX Installation

Fig. 1: KeyPassX Installation Location

There were very a few things that need resolving along the way as the Linux box is practically devoid of relevant development tool-chain. The following are the items that were encountered during the build process:

  • The INSTALL readme file requires qmake-qt4.
  • qmake-qt4 PREFIX is an option to install directly to a preferred directory. For this I used qmake-qt4 PREFIX=/media/<usb_flash_drive> as seen on Fig. 1.
  • The build requires g++.
  • During the build process, an X header file missing error occurred. Electing not on precision installation for X development, I just did sudo yum groupinstall "X Software Development". That should install everything X but the kitchen sink.

Did a make and make install afterwards. This installs the binary on the directory specified by PREFIX.

Installing on Mac OS X

Installing on Mac is a drag-n-drop operation. Fig. 2 shows the installation from the KeePassX-0.4.3.dmg installer to the USB flash drive, whose volume is mounted as NO NAME. Note that the volume already shows three installations: a Linux, Mac OS X, and Windows.

Mac OS X KeePassX Installation

Fig. 2: KeePassX Installation on Mac OS X

The User Interface

Fig. 3 shows the built KeePassX binary on Linux.

KeePassX Running on Linux

Fig. 3: KeePassX Running on Linux

Fig. 4 shows Mac OS X KeePassX:

KeePassX Runnng on Mac OS X

Fig. 4: KeePassX Runnng on Mac OS X

Fig. 5 shows Windows KeePass:

KeePass Running on Windows

Fig. 5: KeePass Running on Windows

The password generator utility is itself a nice utility which can be accessed from the menu directly. This is handy when generating a quick password without intending to save it to the database. Fig. 6 shows the password generator utility.

KeePassX Password Generator Utility

Fig. 6: KeePassX Password Generator Utility

The Final (Pass)word

I use three kinds of platforms on a daily basis: Linux, Mac OS, and Windows, and I use all of them to access different sites. Having KeePass/KeePassX (on my USB flash drive) eliminated the need for mental gymnastics remembering my passwords for each site. I only have to remember the one password to open my KeePass/KeePassX key database. I have to add though that before transitioning to KeePass, it took me a while to memorise the single password I planned to use on it. I only committed to using KeePass when I was absolutely sure I was able to remember the password to it. After being comfortable with the password, I changed all relevant login passwords generated from KeePass and never looked back ever since.

Multi-platform USB Flash Drive Security with TrueCrypt

Just thinking of losing a flash drive full of data is enough to make me feel apprehensive. Which is mostly why I do not carry a USB flash drive for fear of losing it. That was the case until I learned about truecrypttruecrypt provides on-the-fly encryption/decryption (OTFE/OTFD) with a multi-platform support.

If I have been able to go on without carrying a flash drive, why – on account of learning about truecrypt – start now? It turns out, I have suddenly found good reasons for doing it; never mind that others may find my rationalisation as a mere excuse. Here are three of my reasons:

  • I need to carry data in a secure manner.
  • I use multiple platforms: Linux, Mac, and Windows PC. Windows machines are on a separate network. Movement of data between networks is severely limited and USB flash drive is the best way for transport.
  • It is an open-source software according to their licensing terms, and is likely free of hidden backdoor code.

A note about Portable Mode or Usage without Admin Privilege

Truecrypt provides an encrypted volume (or container) to hold data. In order to access the data in the encrypted volume, it needs to be mounted. This action provides the user with a clever view  of a plain unencrypted data. There are two things that happen behind the scene to make this possible: the mounting of the encrypted volume, and transparent OTFE/OTFD of the data to and from the mounted volume. The OTFE/OTFD requires the driver to be installed across machines the user wants to use truecrypt on. The installation of course only being possible with an admin privilege. Once this is installed, only then can any non-admin user use truecrypt.

It does have a Portable Mode though. What this mode does is to give the user the option of running truecrypt without installing anything. Be aware that it requires admin privilege on the machine to run due to the OTFE/OTFD. The following method is how I would use truecrypt on different platforms:

  • Install via sudo on Linux box and use regular username to run it.
  • Install via admin on Mac and use regular username to run it.
  • Forgo install on Windows PC, and use Portable Mode instead. Run it using runas.

Installers

Installers for Linux, Mac OS, and Windows can be downloaded from truecrypt website: truecrypt-7.0a-linux-x86.tar.gz (Linux), TrueCrypt 7.0a Mac OS X.dmg (Mac OS), TrueCrypt Setup 7.0a.exe (Windows).

Linux Installation

TrueCrypt installation in Linux

Fig. 1: Linux install screen

Installing on Linux is straightforward:

  • Extract the installer from the tarball truecrypt-7.0a-linux-x86.tar.gz and run the extracted truecrypt-7.0a-linux-x86.
  • The installation prompts the user with two options as shown on Fig. 1. Choose (1) to install truecrypt in /usr/bin. This requires sudo.
  • At the end of the license term agreement, the user will be asked for the sudo password prior to installation in /usr/bin. as shown on Fig. 2.
TrueCrypt Linux Install sudo prompt

Fig. 2. TrueCrypt Linux Install sudo prompt

After the quick installation, truecrypt can then be ran from the shell. The GUI is shown on Fig. 3.

TrueCrypt application on Linux

Fig. 3: TrueCrypt running on Linux

Mac Installation

Installing on Mac is just as straightforward:

  • Open TrueCrypt 7.0a Mac OS X.dmg
  • Run the installer TrueCrypt 7.0a Mac OS X. After a series of screens, it prompts the user for an admin username/password as shown on Fig. 4. The software will then be installed in /Applications.
TrueCrypt Mac Install

Fig. 4: Mac Install

From the /Applications folder, run truecrypt. Fig. 5, shows the Mac version of the software.

TrueCrypt application on Mac OS X

Fig. 5: TrueCrypt running on Mac

Windows Installation

For Windows PCs, I opt for Portable Mode. The installation is, again, a very straightforward affair:

  • Run TrueCrypt Setup 7.0a.exe. The installer displays the option as shown on Fig. 6.
  • Choose Extract and provide the installer with the preferred directory.
  • Choose a directory that the standard user has a read/write access.

Fig. 6: TrueCrypt Portable Mode Installation

Since it is in Portable Mode, the software can only be ran via an admin privilege. From a DOS prompt, I run it similar to the following:

runas /user:some-admin-user Drive:\ProgFiles\TrueCrypt

Fig. 7 shows the Windows version of the software.

TrueCrypt application on Windows

Fig. 7: TrueCrypt Running in Windows

Conclusion

truecrypt has been a very useful tool for my purpose, and I would continue using it for a very long time. Though if others carrying the software on a USB stick expect it to run on any machine, e.g.: public terminals, they will be disappointed. It simply can not run unless an admin installed the driver prior to using it, or in Portable Mode the user has admin privilege to run it.